

Activating Microsoft Office Using Only PowerShell Commands
Hello everyone, today I'm going to show you how to activate the Microsoft Office suite using only commands in the Windows PowerShell terminal.
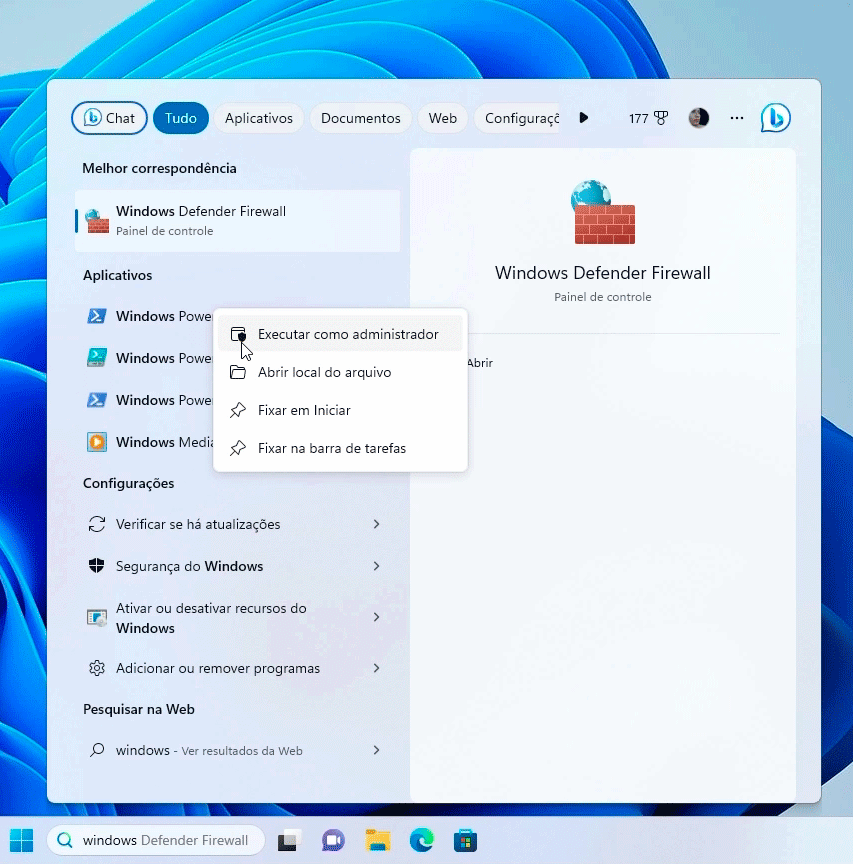
Now, without further ado, let's get to the procedure. Search for Windows PowerShell and run it as administrator.
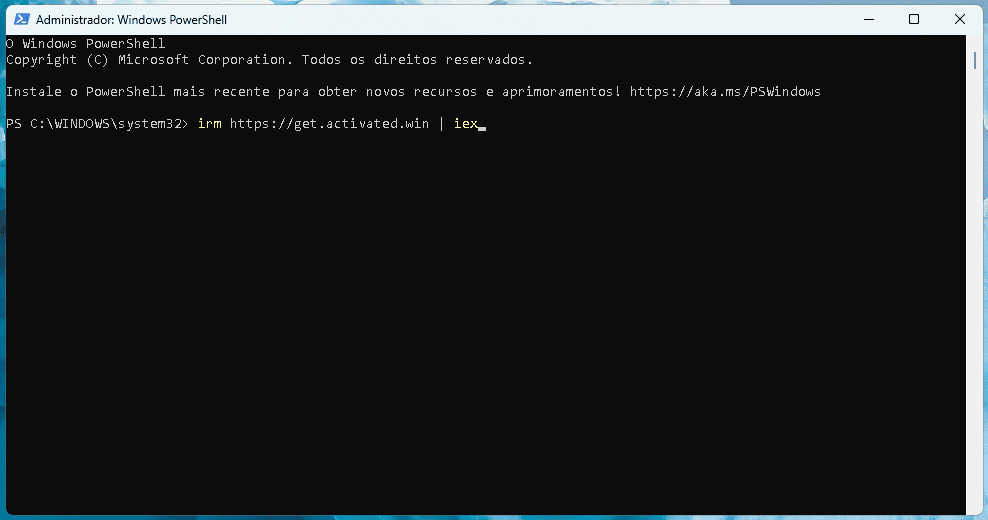
Now with the terminal open, simply enter this command. Just copy and paste it.
irm https://get.activated.win | iex
Pasting into the terminal is very simple: just right-click your mouse, and the command will be pasted. After pasting, just press Enter on your keyboard.
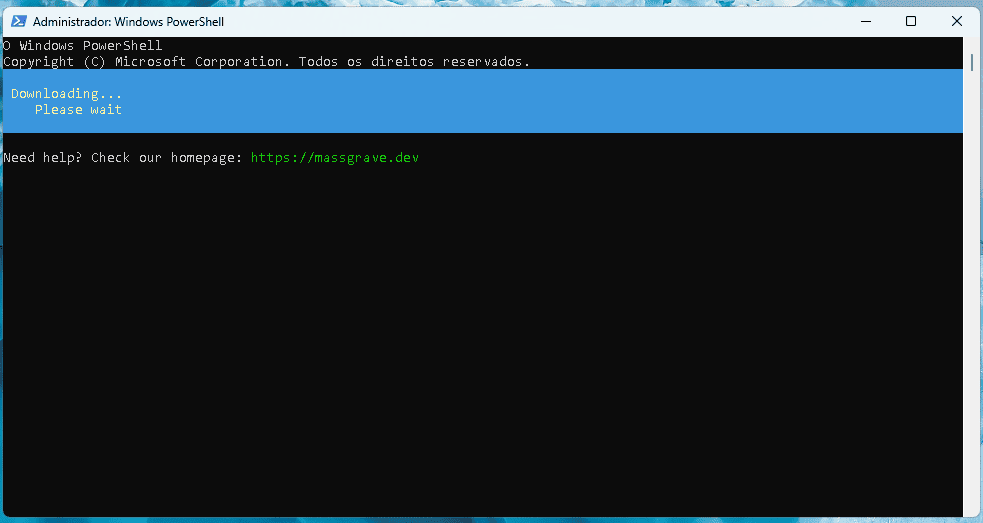
Now just wait for Windows to load the activation software. The software screen looks similar to the terminal.

At this point, choose option 3. To do this, simply press the '3' key on your keyboard. Done, now you will be taken to this second screen. On this screen, choose option 3 again (Ohook), that is, just press the '3' key on your keyboard.
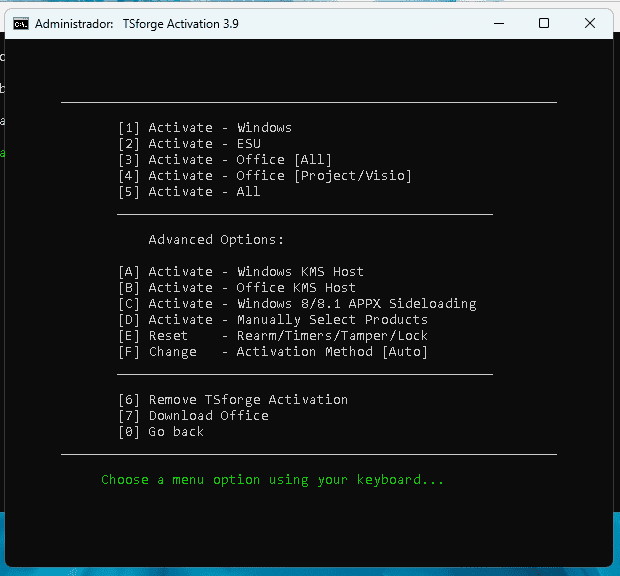
Done, now just wait for the activation process.

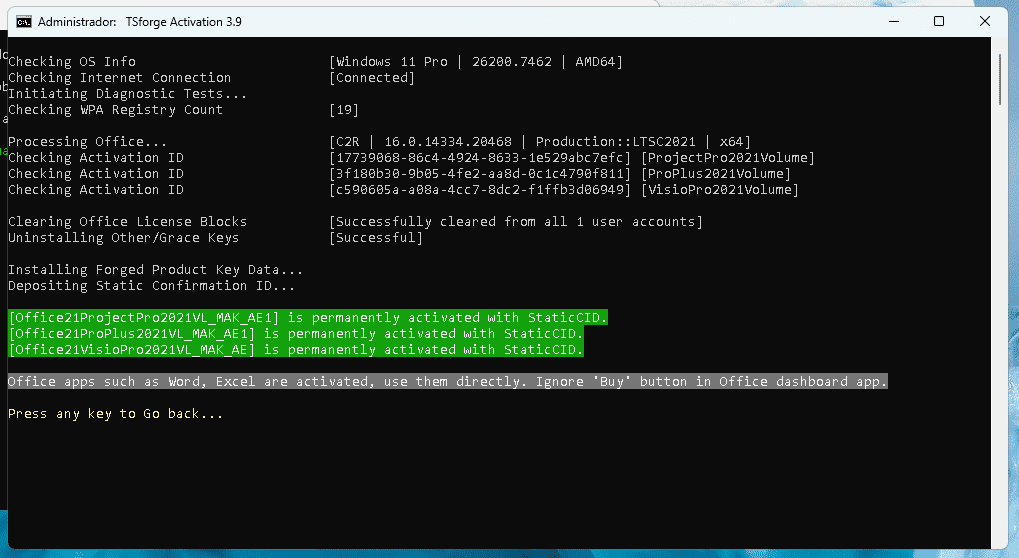
Done, your Office suite is now activated. You can press Enter on your keyboard to return to the software's main menu, and then you can close it. Remember that this process works on 2019 and newer versions. Regarding older versions, I haven't tested it, so if you want to use an older version of Office, you can test if this procedure works.
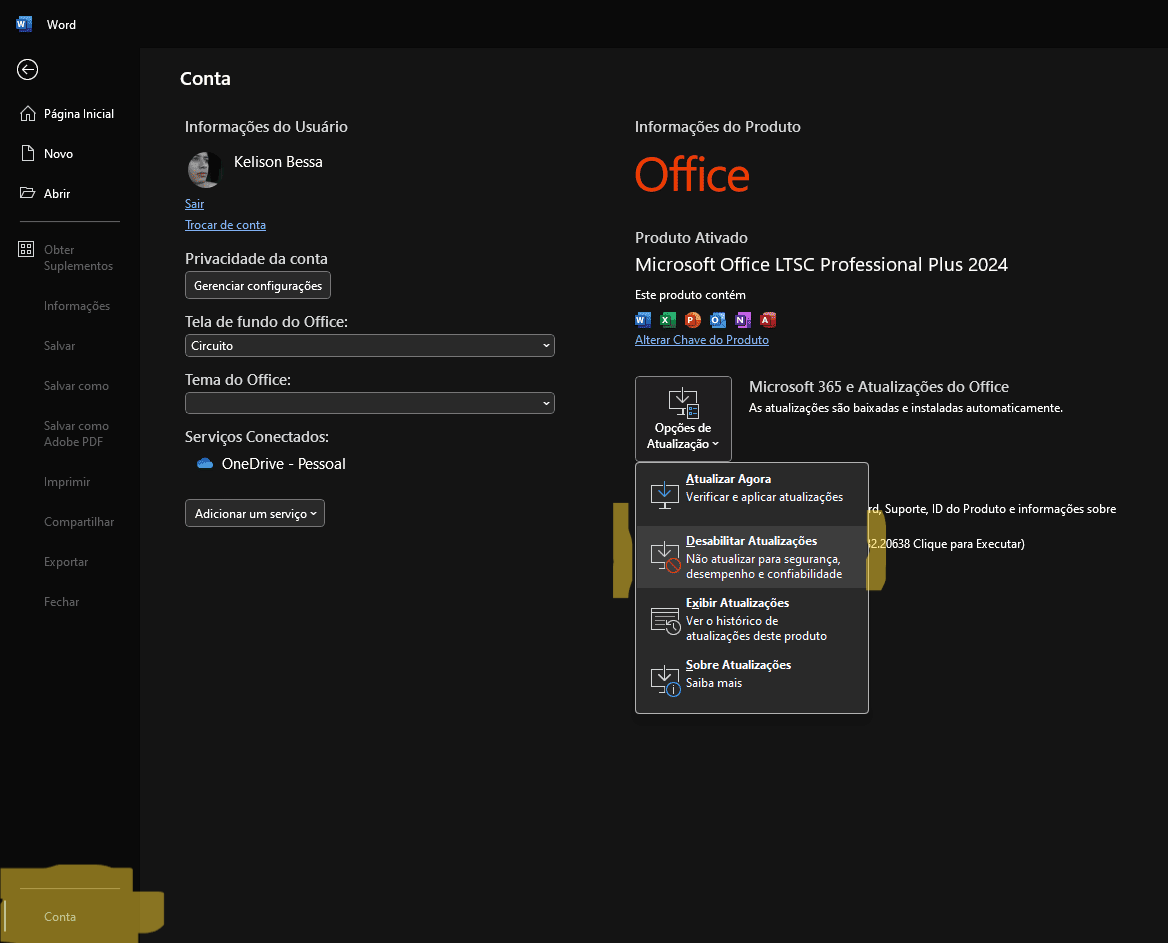
A tip to prevent Office from asking for activation again after a while is to disable updates. Just open a product (for example, Word), and in the bottom left menu click on "Account" and disable updates. If it asks for activation again, just repeat the same process.
Thanks everyone, I hope this article helps! If you liked it, please share it so we can help more people. Thanks and see you next time.
Source: Massgrave